
Is your nativity set in dire need of repair? Does baby Jesus, Mary and Joseph all need a bit of TLC?
We have the tutorial here, right now for you, on how you can fix chips and broken pieces.


Baby Jesus is a little spotted and stained.

Here Joseph’s staff is gone, and needs to
be replaced.

Here, more damage to his foot, and on
part of his clothing.


Items needed for your repair.
Durham’s water putty
Wood glue
Dowel (measured length)
Drill and Bit size of
Toothpicks
Bowl to mix
Plastic ware for mixing
Small putty knife
Pencil
Pliers
Awl
Water
Paint Brush
Paper towels
Chances are you may have something different than the picture
shown, but this will work on any type of resin or plaster type
statue used for display at Christmas.
To begin you will need to have your area set up with
all the supplies listed.

To replace a long piece such as the staff, you will
need to give it something to hold on to. I began by
drilling into the hand where the staff originally
was. Then taking the toothpick, I glued the end and
inserted it into the drilled hole. You will need
to let it dry completely.


Using the awl, push or tap, (with a hammer) a hole into the bottom of the
dowel, deep enough for the toothpick to fit into. (Do not glue yet.)

Next lay the dowel into the position it was originally,
or where you would like it, and mark it with a pencil,
where you want the cut off to be. It needs to fit nicely
without too much extra length. This is where the staff
or piece will be for the final placement.

Notice in the next picture, how the toothpick is at the same
angle as the dowel? This will help you as you place your
dowel at the right angle. This way the toothpick won’t be
stressed and break.

Mark where your cut will be.

Next, cut the toothpick off at about one inch down from the glued area.

Cut your dowel at the mark, using the pliers.
Pinch around all sides.
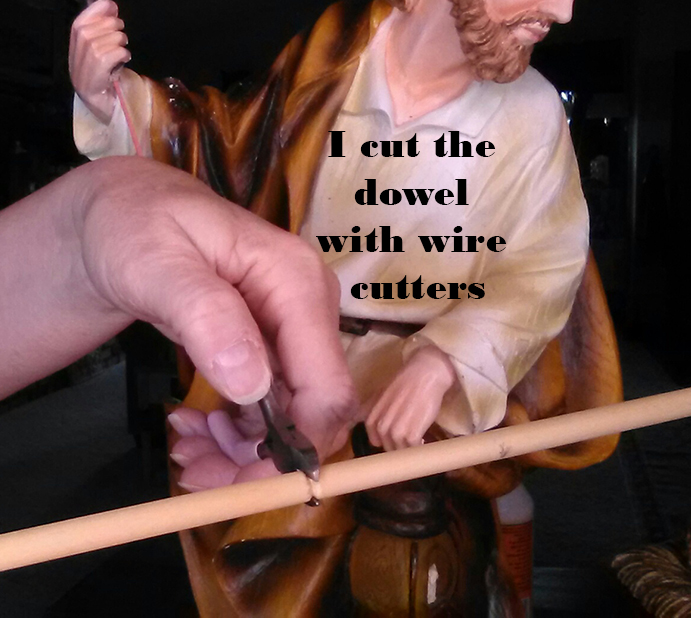
It will snap in two.


At this point, when gluing the dowel to the hand
and toothpick, you want to make sure that it is in the exact
position to begin to use the Water Putty on.
Apply a dab of glue on the end of the toothpick
and insert it into the dowel and let dry in place.


Following the directions on the Durham’s Water Putty,
make a small batch, as it goes a long way.


Using your putty knife, apply the putty to
the top of the staff, working your way down
to the bottom, as shown in the following
pictures. You will build the layers as you go
so they will be the thickness you need.
As you apply additional layers of putty,
it will cause the stick to look more like a
branch than a dowel.

Add more putty in areas to enhance the
branch look.

Clean up any of the putty that gets onto
places you don’t want it to be.


I placed the staff on the inside of the
sandal for added support. I’m not sure, but I think,
it was on the outside where the break is on the foot.
(I purchased this recently)

I began building up the staff and foot
so that is will be bonded nicely.

Let this dry completely before moving it around.

Joseph’s sandal and toes needed to be fixed as well.
Use the same putty mixture for the rest of the cracks
and chips on the items needing fixed. You can use
the paint brush too, as it makes it easier to smooth out
these areas.

When the putty begins to set, you can use the putty knife
to form it as you need to.

Fill in chips and then
gently wipe them smooth with the paint brush
or a wet paper towel.

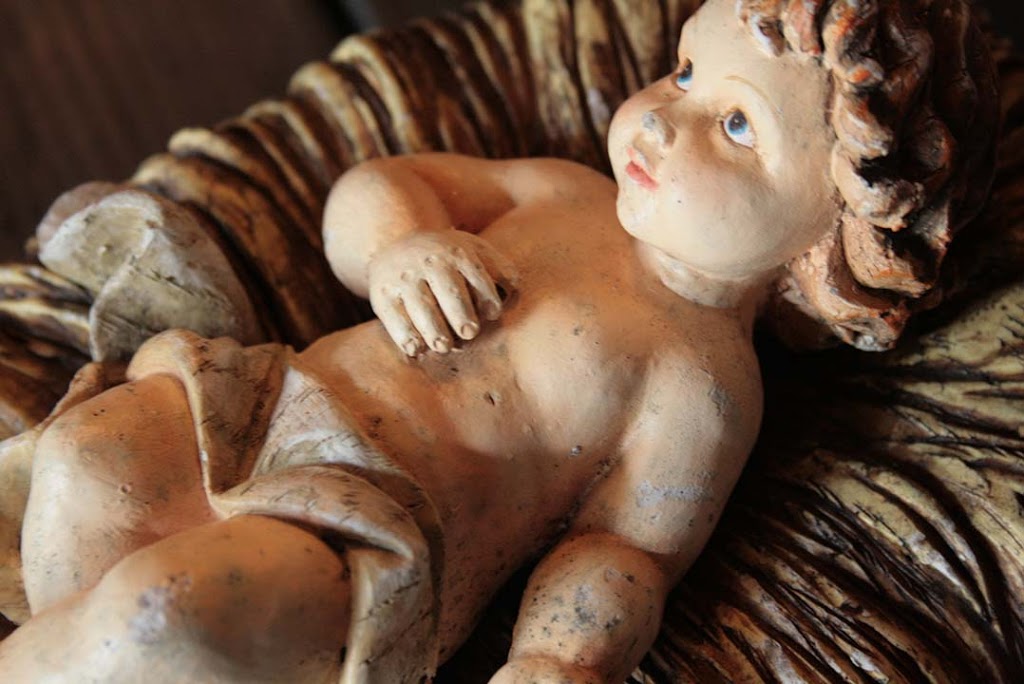
Baby Jesus was very pitted and stained so I used the putty
and the paint brush to smooth over his skin areas. This
did not cover very well so he will be painted again.

The manger only has a small chip so it will be painted too.


If you have any questions, please contact me at:
How Baby Jesus, Mary and Joseph look painted…
Check back in a tiny bit…


What an awesome find! Very clever with the toothpick and the direction Josephs staff is attached. I can see where it used to be and why his foot is chipped. Can't wait to see the finished product and final painting. What a beautiful set!
Thank you so very much for commenting. I am glad you liked the tutorial. God bless. Kimberly