Hello Everyone,
This is a fun and
useful tutorial.
Enjoy!
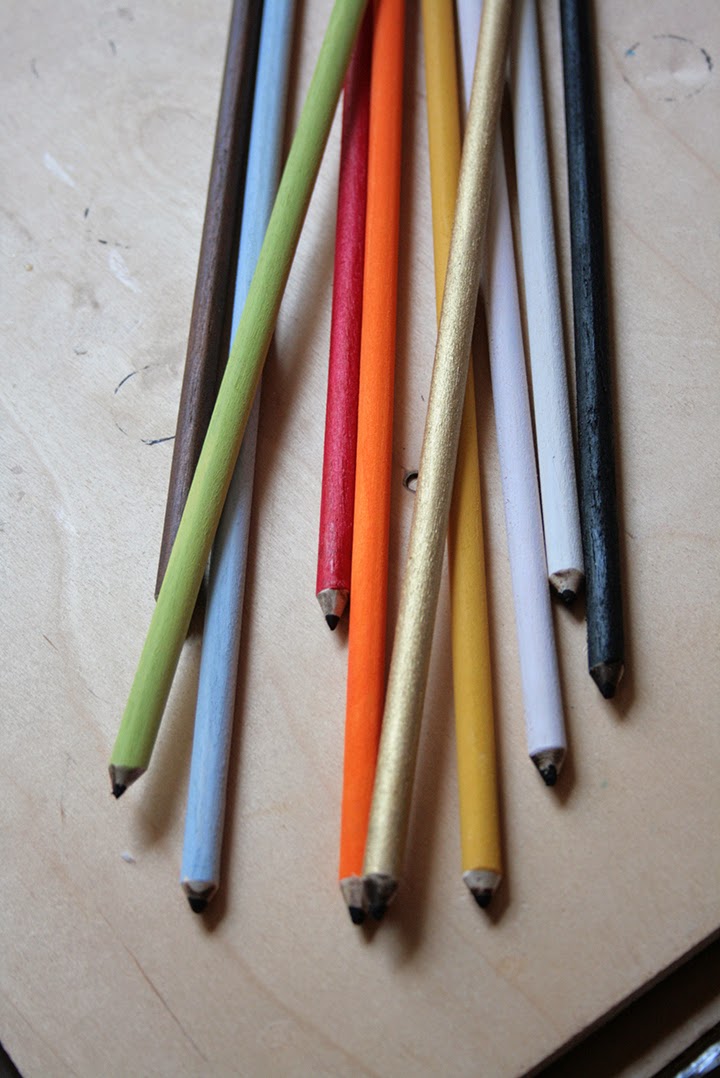
DECORATIVE PENCILS
Decorative pencils that I made to
help organize my new art room.
They go together with the Ikea
BYGEL Rail found here:
(At the time of me making these (May 2014)
the price was a lot less for the rails.)
I think it could be worth your time and money to
look around for a better price on them.
They come in two lengths of which
I choose the smaller size.
If you need the larger you would need
to use one dowel for each rack.


They are made with the following supplies:
*1/4 inch dowel 36 inches long, cut into 2-20 in pieces.
(You will need one for each rack you install and
you will have some left over)
or
*1 dowel for each rack if using the longest size.
*Acrylic paint colors of your choice
*Black acrylic paint (for lead)
* Eraser colored acrylic paint if you
choose to have an eraser end.
*wire cutters
*straight knife or belt sander
(Have not tried it but a pencil sharpener might work)
*A glue gun and glue sticks.
To begin:
Before you begin you need to decide if you want your faux pencils
to have and eraser end or just two sharpened ends. I choose two sharpened ends for mine.
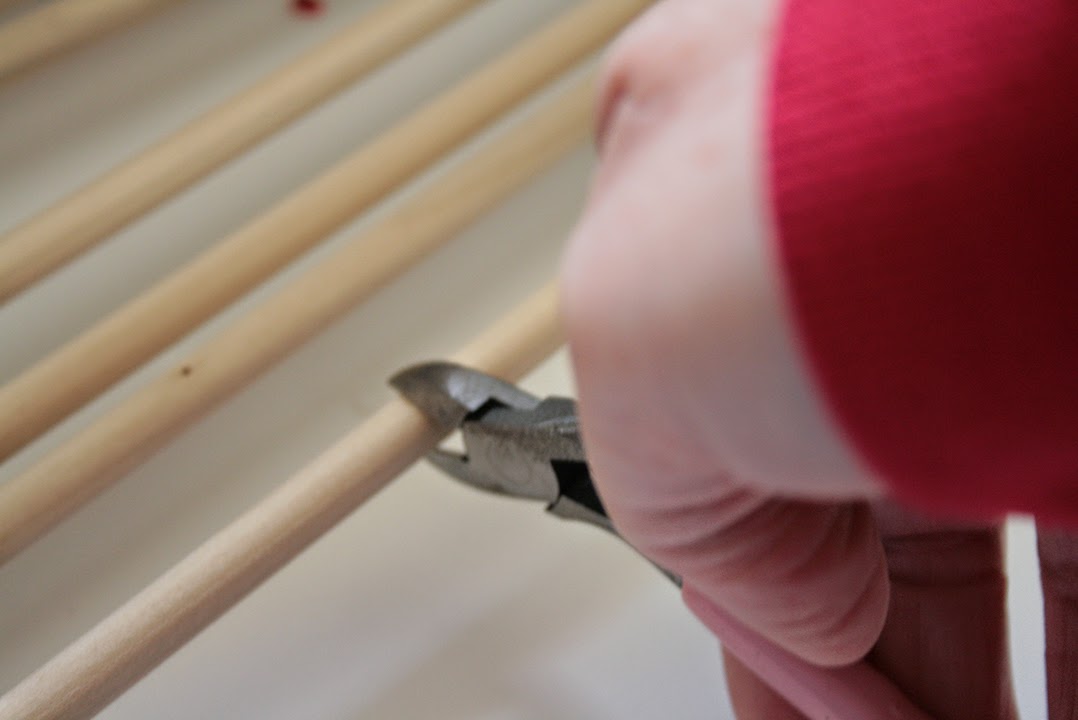
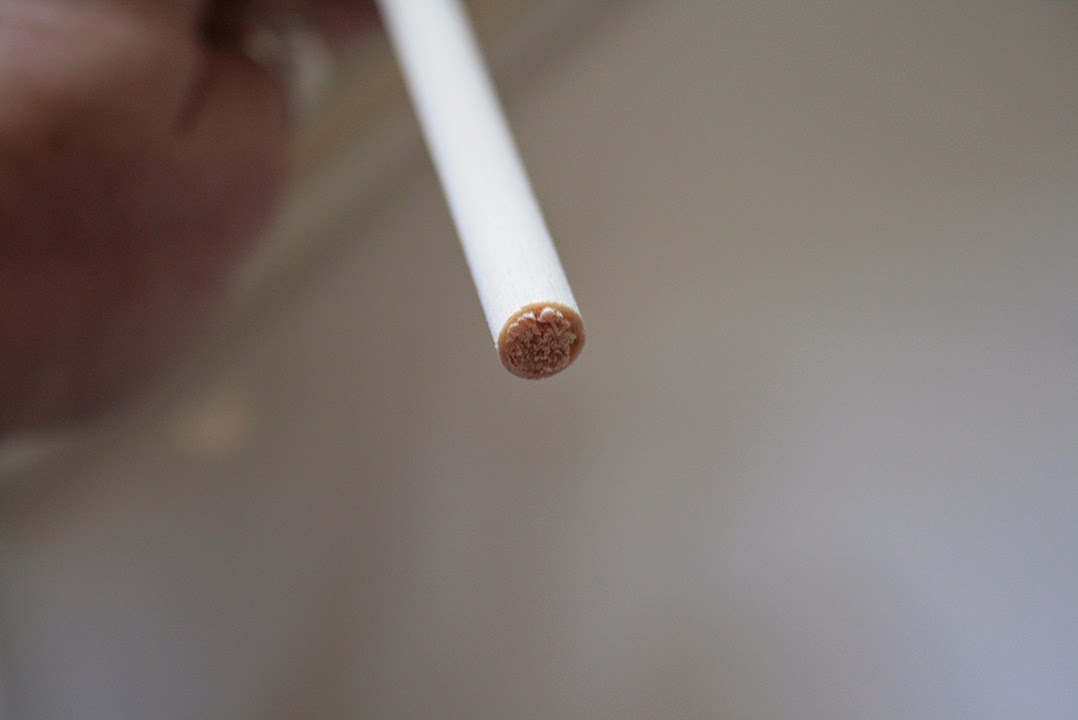
Measure and cut your dowels. Using your wire cutters, pinch at the 20 in. mark on one side and then turn the dowel and pinch at the same place again. The dowel should snap and break at the marked point. If you are making one end the eraser end then you will sand one of the ends to look like that of a pencil’s eraser.
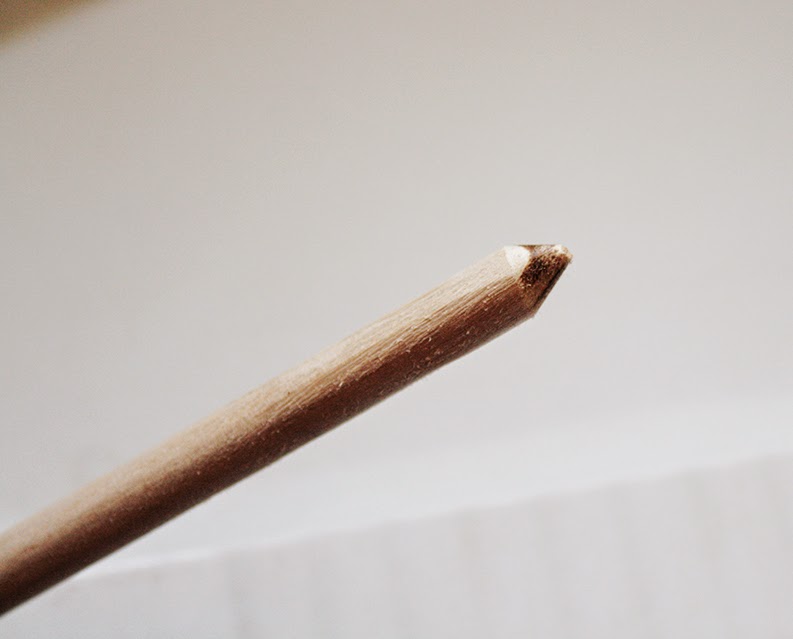
Next you want to make the sharp end. I used a grinding wheel for mine, since that is all I had. I have suggested a belt sander since this is easier. You can use a straight knife if you don’t have access to the other two. Just whittle the tips out.
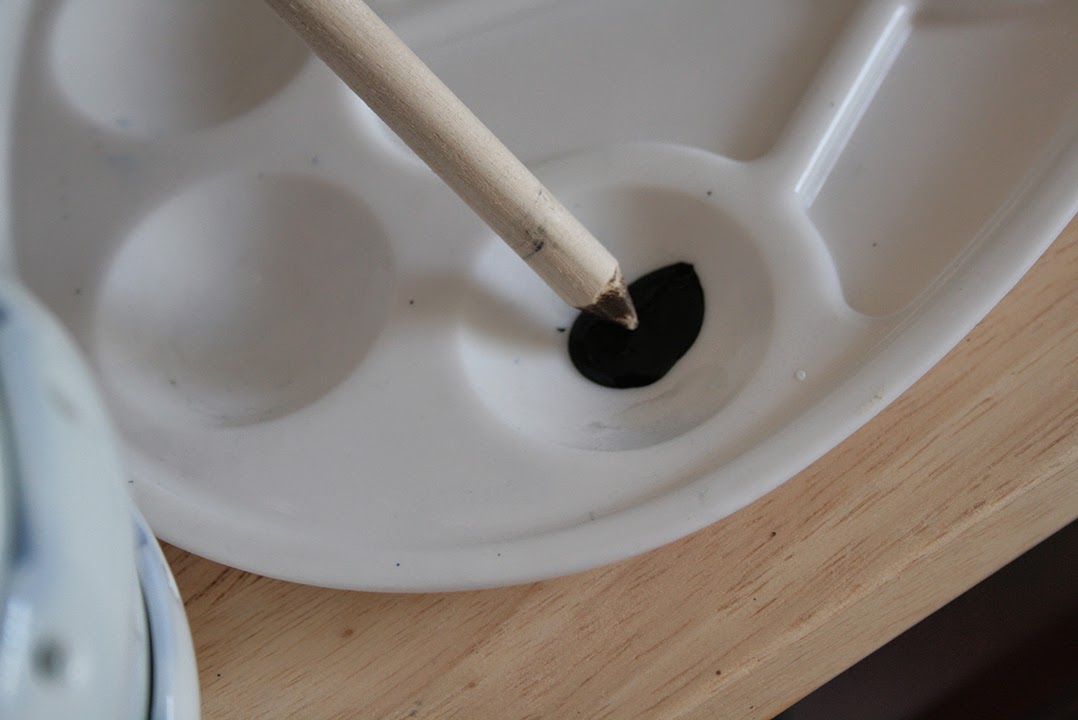
Place a small amount of the black paint onto your pallet
and dip JUST THE TIP of your point into the paint.
Don’t go up too far on the tip. You should now have your faux lead.

Since I did not paint an eraser on my ends I don’t have pics for that but I at this point you want to place an eraser color of paint on the pallet and dip the flat end into that. I would then take a silver
pen and draw some lines around the top of the eraser part to look like the metal on a pencil.

After all the tips and (ends if you chose them) are completed begin to apply the colors you have selected for the pencil colors themselves. I chose my favorite colors with some browns and a silver and gold for mine.
You may seal each pencil but it isn’t necessary.

After mounting the Ikea rods to my wall I then added the faux pencils under each one so that the paints would not fall through. I used a glue gun but have to say I have had to re-glue a couple of them because they do not stay attached very well.
For me I really don’t mind
because if I decide to move them I won’t have too much
to repair on my wall to do from the pencils,
just the holes from the rods. Easy enough.
You can drill holes into the dowels at both ends and
then nail them to the wall if you prefer.
I installed this behind my door for easy access.


That is it. Load your 2 oz. paints into the rods and be organized.
It feels great!
Note:
I found the tutorial for the racks online in a blog, and I have spent most of the day trying to re-find it to no avail. I don’t think the pencils where included in that tutorial but If you
come across the other tutorial please
post it here or email me so I can
give credit to her. She did an
awesome job on hers.
Until I get back on here again, which should
be soon since I have a lot more
to share.
Enjoy and God bless!


Welcome back! You have some very pretty photos on both sides of your blog. Sometimes life needs to take a break for any and all. Hope you're refreshed and enjoying what you love best.
Thank you Sylvia. It is good to get back on here. Thank you for the kind comments as well. Always taken with much appreciation.
God bless you.